
Part 1: Making things
Part 1 of the manual of Amulets of Anubis. If you’re a developer and want to know the inner workings, view part 2.
This part is for anyone who’d like to make the game their own: new stops, new pictures, different words, a harder journey down the Nile or a kinder one. You don’t need to be a programmer to be able to do any of that. The vast majority of it is simple text. Some things do need a tiny bit of easy-to-understand code, which I’ll walk you through line by line in chapter 9.
Don’t worry about breaking anything! Every time you build the game, it checks all of your work first. If something is wrong, it tells you which file and line the mistake is in and what to do about it. Your last working game stays exactly as it was until you’ve fixed it.
Where else to look
- Part 2 is meant for developers. It explains how the game works on the inside.
- The content reference lists every setting of every kind of file. It’s handy when you need the exact name of something.
Contents
- Getting ready
- The quick way
- How the game is put together
- The words the game uses
- Pictures
- Words and numbers
- Adding something new
- Is it fair? Checking the balance
- When the list isn’t enough: a little code
- If something goes wrong
- Sharing your version
1. Getting ready
What you’ll do: install two programs and build the game. Time: about 15 minutes.
You only need two programs for this and both of them are free.
A text editor. This is a program for changing plain text files.
- I would recommend VS Code. It works on every computer and colours the text for you, which makes it much easier to spot a missing quote mark.
- Notepad++ on Windows or TextEdit on a Mac work too. In TextEdit, you have to choose Format → Make Plain Text before you save, though.
- Please don’t use Word or Pages! They add hidden formatting to the text that the build can’t read.
Python 3. This is the programming language the build is written in, so your computer needs it to build the game.
- On Windows, double-click
build.bat. If a window tells you that Python can’t be found, download it from python.org. During the installation, make sure to tick the box that says Add Python to PATH. - On a Mac or on Linux, it is often already installed. Open the Terminal app, type
python3 --versionand press Enter. If you see a version number such asPython 3.12.4, you’re good to go.
Building the game
“Building” turns all of the small files into the game.
- On Windows: double-click
build.bat. - On a Mac or on Linux: open Terminal, type
cd(with a space after it), drag the game’s folder onto the window and press Enter. Then typepython3 build.pyand press Enter.
You should see: a few lines of text ending with Done. The game has successfully been built! It can be found in dist/amulets-of-anubis.html. Double-click it to play.
That one file is the whole game. You can copy it anywhere, send it to a friend or keep it for twenty years and it will still work.
Keep a copy before you start. Duplicate the whole folder. If you ever get lost, you can always go back to the copy.
2. The quick way
I would recommend the following workflow for quickly and easily adding new things to the game.
1. Let new.py start new things for you. Double-click scripts/new.bat on Windows, or type python3 scripts/new.py on a Mac or Linux. It asks you what you’d like to make and what its id should be. Then it writes a working file in the right folder, with a comment on every line explaining what it does and copies any pictures it needs for you to draw over. The new thing works right away, so you can build and see it in the game before you’ve changed anything at all!
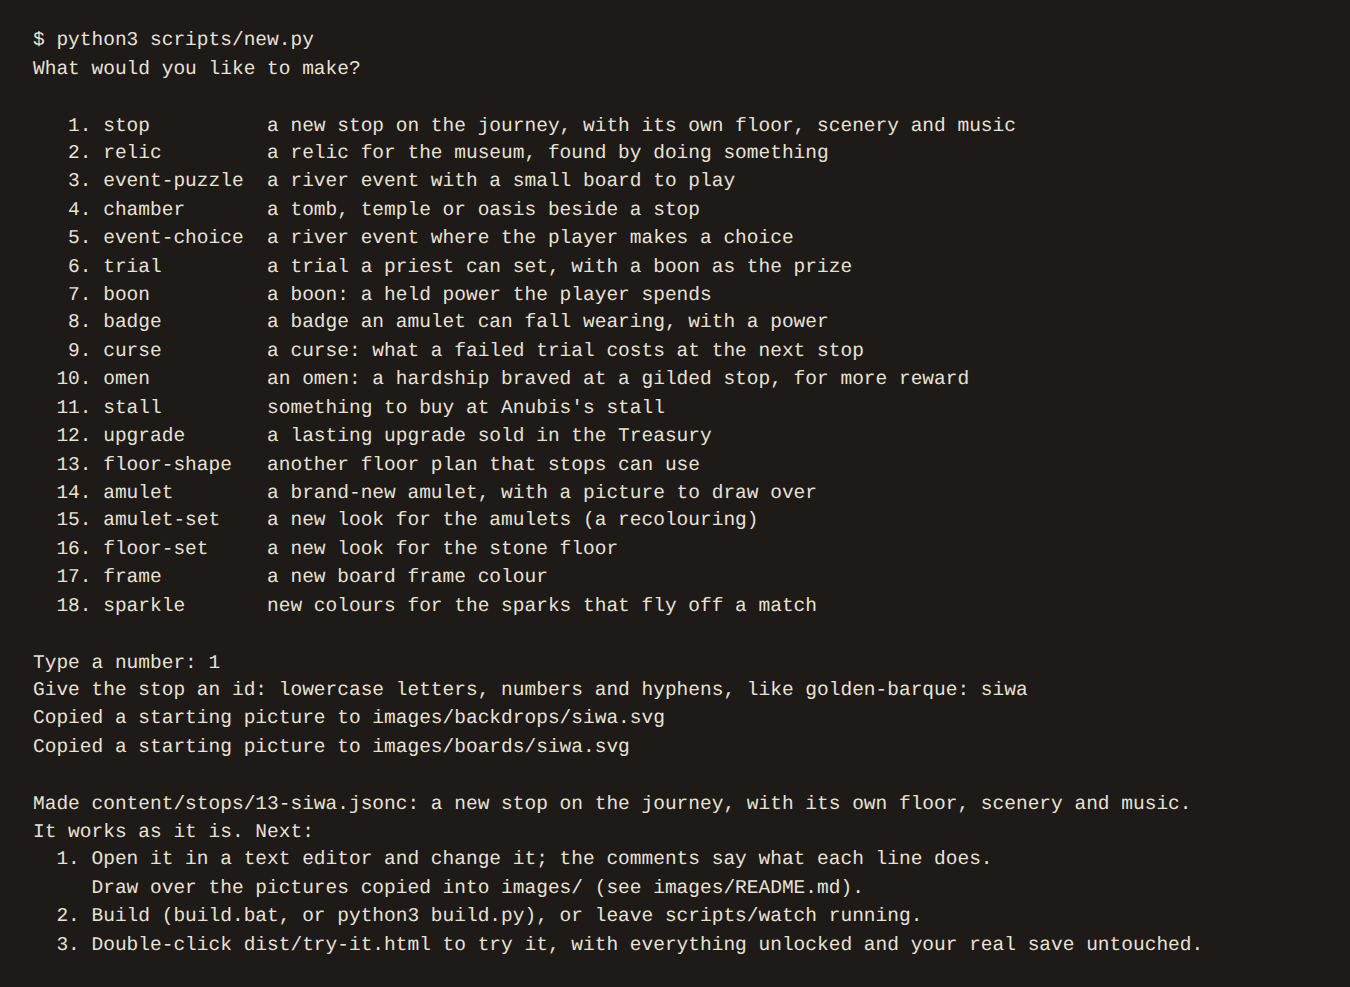
scripts/new.py asks what you’d like to make and writes a file that works straight away.
You can also skip the questions and say it all at once, such as python3 scripts/new.py relic golden-ankh. These are the things it can make:
| Name | What it makes |
|---|---|
stop | a new stop on the journey, with its own floor, scenery and music |
chamber | a tomb, temple or oasis beside a stop |
event-puzzle, event-choice | a river event: a small board to play, or a choice |
trial | a task a priest can set, with a boon as the prize |
boon, badge, curse, omen | the powers and hardships of the game |
relic | a relic for the Museum, found by doing something |
stall, upgrade | something for Anubis’s stall, or a lasting upgrade in the Treasury |
amulet | a brand-new amulet, with a picture to draw over |
floor-shape | another floor plan that stops can use |
amulet-set, floor-set, frame, sparkle | new looks, earned by playing |
2. Let the game build itself. Double-click scripts/watch.bat, or type python3 build.py --watch and leave the window open. From now on, every time you save a file, the game is built again all by itself. If you make a mistake, you’ll know right away. To stop it, close the window or press Ctrl+C.
3. Try it out in try-out mode. Double-click dist/try-it.html. This is a special copy of the game meant for testing only (with its own save, separate from your actual game). It unlocks everything and starts at the place that you last edited! It also comes with lots of money and every boon in your inventory, so you can test things more easily. After each change, simply refresh the page.
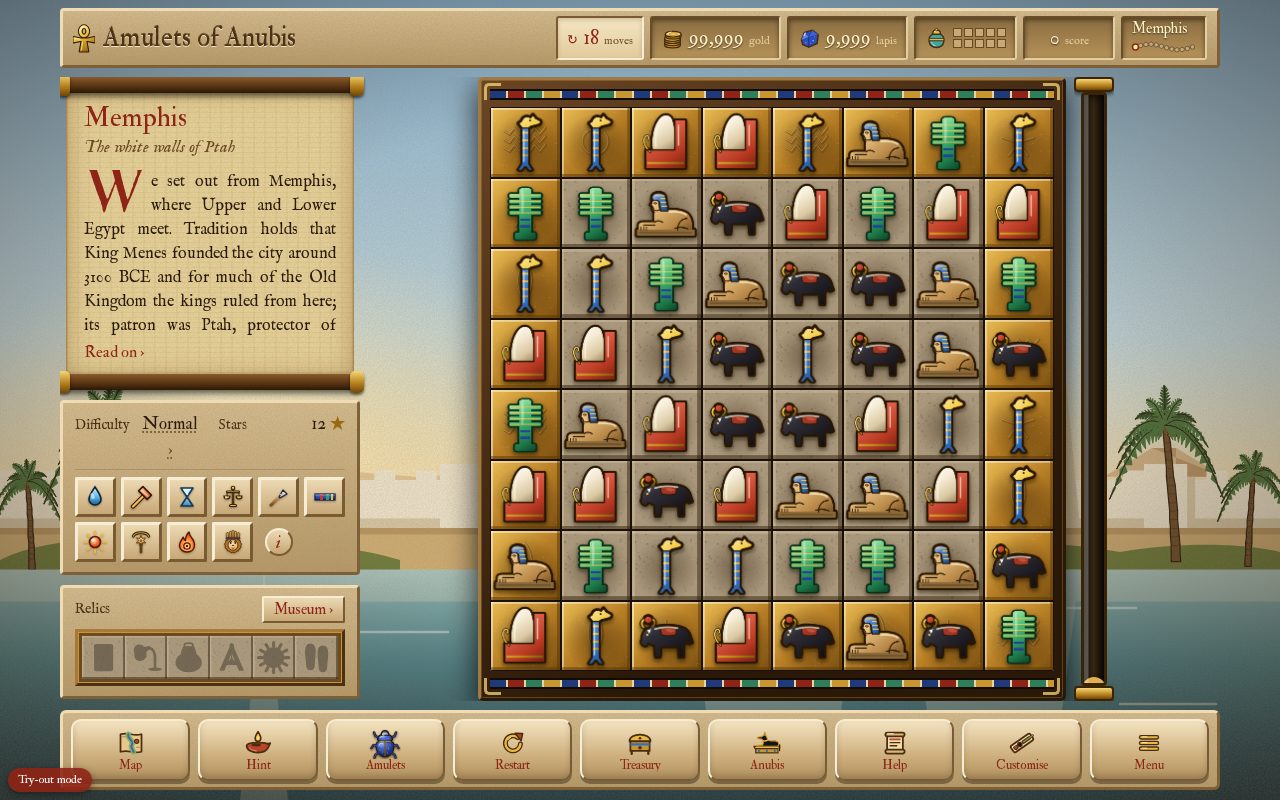
Try-out mode opens at the stop you just made. The red badge in the corner reminds you that this isn’t your real save.
3. How the game is put together
Before you start changing things, it helps to know what each folder is for and what the build does with it.
| Folder | What’s in it |
|---|---|
content/ | Everything a player sees or reads that isn’t a rule: the stops and their history notes, the relics, the river events, the shops, the looks and every word on every screen. There is one small file for each thing. This is where you will be doing almost all of your work. |
images/ | Every picture: amulets, scenery, floors, badges and icons. images/README.md lists every folder and how its files are named. |
engine/ | The code: the rules of the game, the drawing, the sound and the screens. You only need to open it in chapter 9. |
What the build does
When you build, the build (engine/build.py) goes through five steps:
| Step | What happens |
|---|---|
| 1. Read | It reads every file in content/ and images/. |
| 2. Check | It checks every setting and every floor plan. For instance: can every stone on the floor actually be matched? |
| 3. Connect | It checks that everything a file mentions actually exists. If a stop uses the scarab, for example, there has to be an amulet file for the scarab. |
| 4. Put together | It puts the checked content and the pictures into the code. |
| 5. Write | It writes one file, dist/amulets-of-anubis.html, as well as the try-out copy, dist/try-it.html. |
If step 2 or 3 finds a problem, step 5 never happens. Instead, the build tells you the file, the line and what to do about it.
This is also why the code never needs to know that your new stop exists. Once you’ve added a stop’s file and its pictures, its scenery, its place on the map, its music and its page in How to play all follow by themselves.
New players get to know the game a bit at a time. On a first journey, the game introduces its parts one by one: seals, badges, trials, the stall, river events, cursed badges, tombs and oases, then omens. Each of these arrives with a banner. This means that a new boon or omen of yours only appears in a first journey once its part of the game has arrived. Try-out mode, on the other hand, always has everything turned on.
In the engine: Part 2, chapter 2, The build describes each step in detail.
4. The words the game uses
Before we go any further, it helps to know the names the game uses for its pieces, since the files and this manual both use them all the time.
| Word | What it is |
|---|---|
| Stop | One place on the journey down the Nile, like Memphis or Karnak, with its own floor, amulets, scenery and music. |
| Amulet | The pieces the player swaps. Three or more of a kind in a row make a match. |
| Stone, gild | The squares under the amulets. A match on a stone gilds it, which means it turns it to gold. Gild the whole floor to win the stop. Bare stone needs one match; thick stone needs two. |
| Special | An amulet made by a bigger match. Four in a row makes a banded one, an L or T shape a ringed one and five in a row the winged sun. Each of them clears more when it’s matched. |
| Badge | A mark that some amulets wear when they fall in. When the amulet is matched, the badge’s power is used. Badges with a red ring are cursed, meaning their power hurts the player instead. |
| Boon | A power the player keeps and can use whenever they like, such as the Flood of the Nile. |
| Trial | A task a priest sets at the start of a stop. Finish it and you win a boon; fail it and the next stop is cursed, which makes it harder. |
| River event | Something that happens between two stops: either a short puzzle on a small board or a choice. |
| Chamber | A tomb, temple or oasis beside a stop, which opens once the stop has been gilded. Tombs have amulets buried in sand; oases have amulets under water. |
| Cover | The sand or water an amulet can lie under. It can’t be moved until a match beside it has brushed the cover off. Each cover is a file in content/covers/. |
| Seal | Three small challenges at every stop, such as “win without using a boon”. |
| Omen | A hardship a player may choose to face at a stop they have already gilded, in exchange for a bigger reward. |
| Relic | A lasting reward for a deed, kept in the Museum. |
| Gold, lapis | The two kinds of money. Gold buys one-time help at Anubis’s stall; lapis buys lasting upgrades in the Treasury. |
| Look | Something that only changes how the game looks: amulet sets, floors, frames and sparkles. Players unlock looks by playing. |
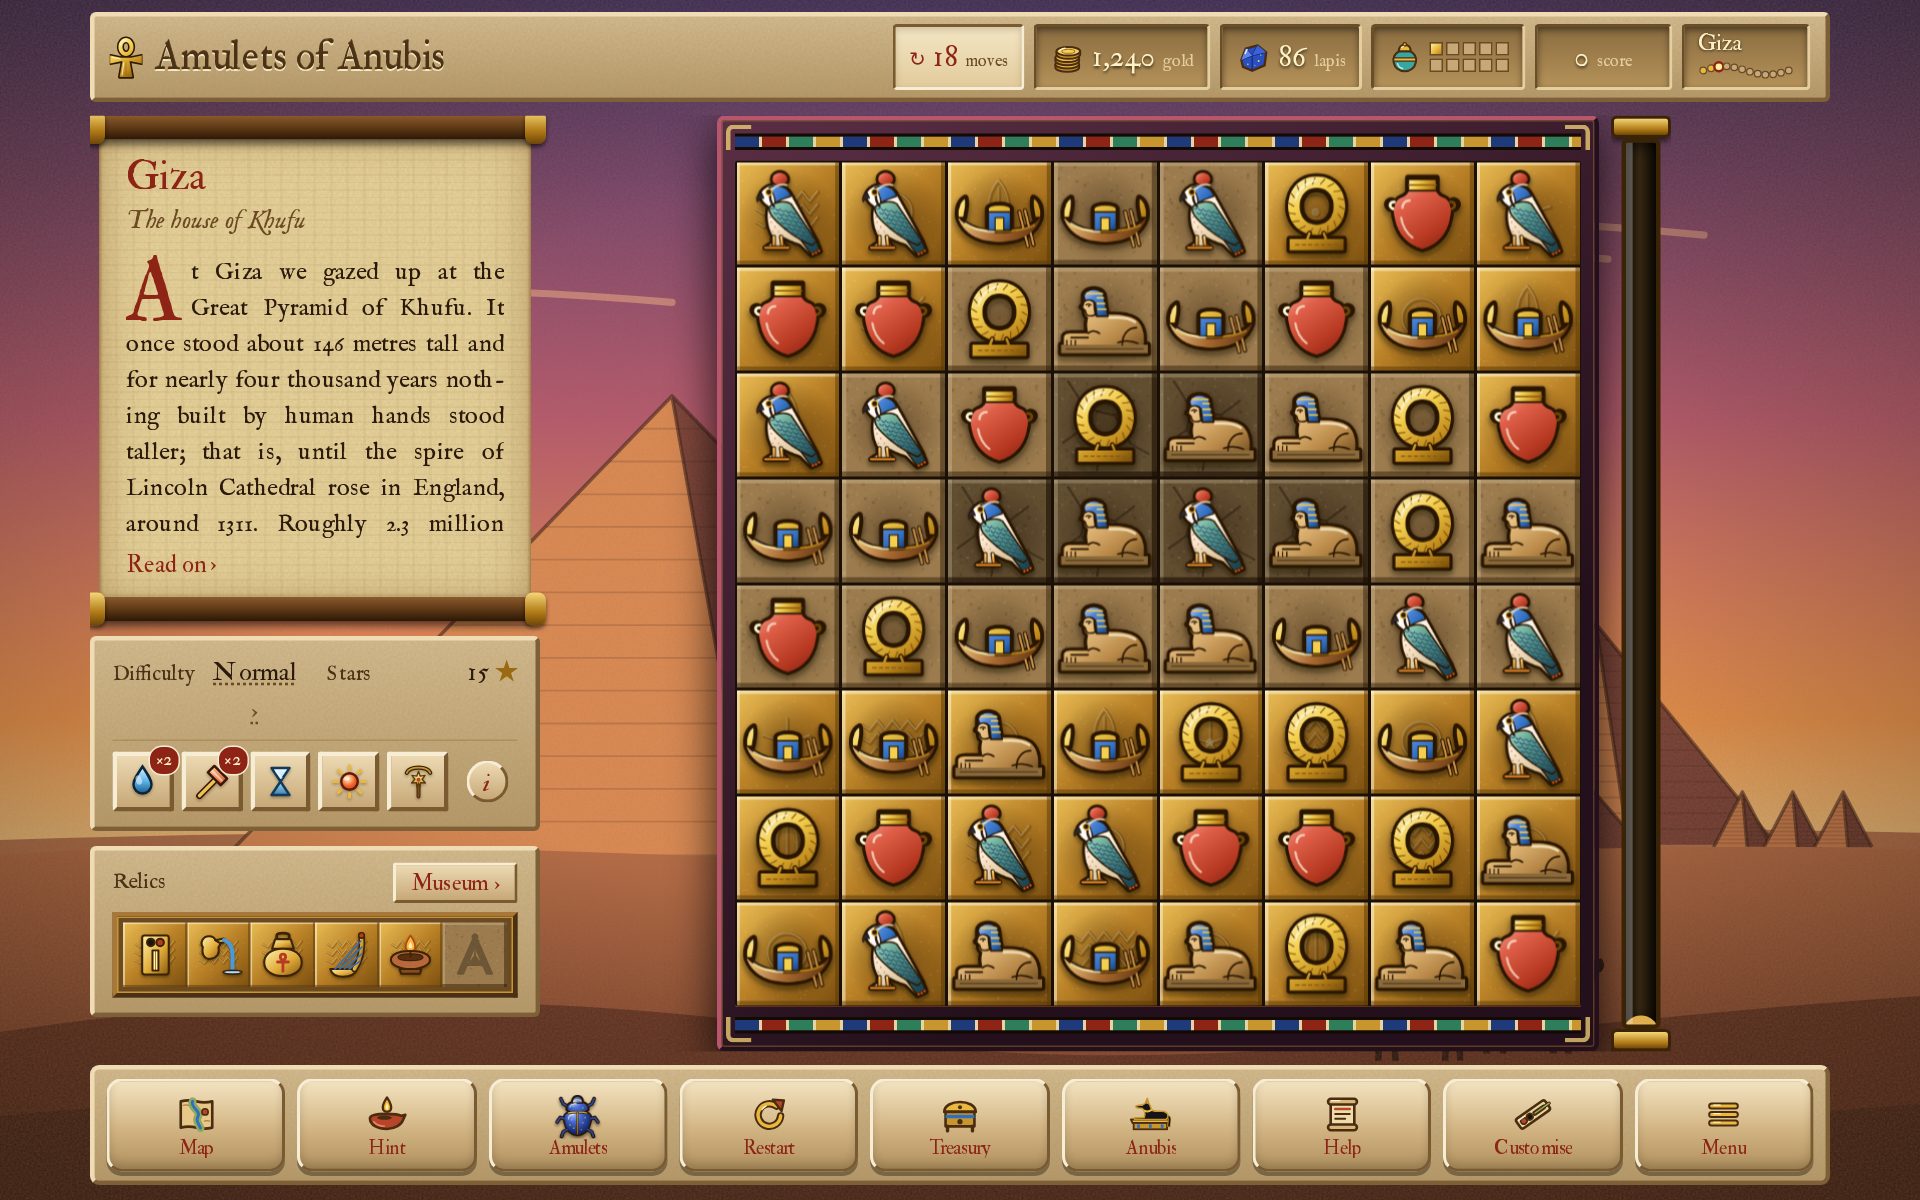
Giza in play. Beside the board, you can see the stop’s history note, the difficulty and the boons held and the relics found. On the board, some stones have already been gilded. The tube on the right fills with gold sand as the floor is gilded.
5. Pictures
Every picture in the game is a file in the images/ folder. To change one, simply replace the file with your own (keeping the same name) and build.
Try it first
This is a nice way of seeing how it works:
- Copy
docs/examples/scarab.pngintoimages/amulets/. - Build and play the first stop.
You should see: every scarab is now that picture! A .png or .jpg is used instead of the .svg of the same name and the build lets you know that it did so. Delete the .png and build again to get the original back.
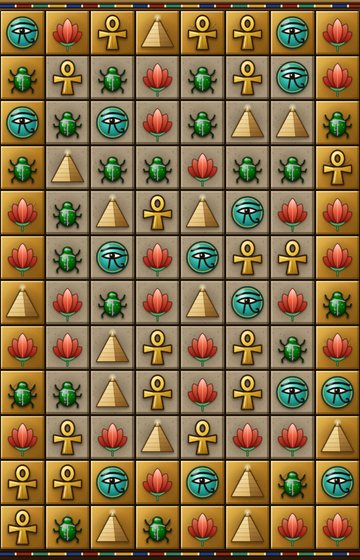
Where each picture goes
The pictures that come with the game are SVG files. These are drawings made of shapes rather than of dots, so they stay sharp at any size. You can open one in Inkscape (which is free), change it and save it under the same name. You can also drop in a .png or .jpg with the same name instead.
| Folder | What goes in it | Name the file after |
|---|---|---|
amulets/ | the pieces the player swaps: square, with a see-through background and a small margin | the amulet: scarab.svg. A new name is a new amulet, so golden-falcon.svg becomes an amulet called golden-falcon. |
backdrops/ | the scenery behind a stop and behind the title screen while you’re there. It’s wide (1600 × 1000) and the edges are cut off on some screens, so keep whatever matters near the middle. | the stop: giza.svg is behind Giza |
boards/ | what shows through the gaps of a floor with holes in it: square, 800 × 800 | the stop |
floors/<floor set>/ | the squares under the amulets: bare, thick and gilded-1 to gilded-4 | fixed names |
relics/ | a picture that replaces a relic’s icon | the relic: <relic id>.png |
amulet-sets/<set>/ | an amulet set’s own pictures, drawn instead of the usual ones (see New looks) | the amulet: scarab.png |
Make amulets easy to tell apart. Players recognise amulets by their colour first and their shape second. Two amulets of the same colour at one stop are really hard to play, even if their shapes are different. In the same way, keep bare, thick and gilded floor squares easy to tell apart.
Icons
Icons are the small drawings on buttons and screens. They are SVG files, which can be found in images/icons/, sorted into these folders:
| Folder | What’s in it |
|---|---|
dock/ | the buttons along the bottom of the screen |
boons/ | one per boon |
relics/ | one per relic |
menu/ | the tiles of the Menu and the title screen |
codex/ | one per chapter of How to play, named after the chapter |
stall/ | the things Anubis sells that aren’t boons (a stall file picks one with "icon") |
ui/ | the ankh (title-mark), stars, the seal, the barque (boat), Anubis (keeper), Apep (omen) and the doorways |
map/ | the Nile map (background) and its markers |
Icons have to stay SVG files. Keep the viewBox at the top of the file as it is and give any gradient inside of it a name that no other icon uses (see below).
In another drawing program
The SVGs open in Inkscape, Affinity, Illustrator and Figma as shapes you can change. For other programs, python3 engine/tools/art-export.py makes the folder dist/art-export/, with every picture as a PDF, the small ones as pixel art at 32 and 64 pixels, as Aseprite files and as sprite sheets for game engines. (The build also makes a large PNG of every picture, in dist/art-references/.)
When you save an icon back from a drawing program, check two things (the build checks them too):
- It’s a clean SVG. In Affinity or Illustrator, export it as SVG with the text turned into shapes. A picture that isn’t written properly stops the build.
- Its gradients have names of their own. A gradient (a colour that fades into another one) has a name inside of the file. Drawing programs call them
_Linear1,_Linear2and so on in every file. Since all icons end up on one page, the second icon would then end up with the first icon’s colours. If this happens, the build names both files. Simply rename the gradient in one of them, in both places it appears (id="_Linear1"andurl(#_Linear1)).
Some pictures are drawn by a script: the scenery (tools/scenery/) and many of the amulets (tools/amulets/draw.py). If you edit one of those by hand, don’t run its script again, or it draws the old picture right back.
A word on picture sizes. I would recommend that you keep pictures small, as each picture makes not only the game bigger but also the amount of data a player has to download if they play in the browser, as well as how much memory (RAM) the game uses. And with how memory prices are going right now, that’s not something you want! The build has a built-in warning that lets you know if you add any picture over 2 MB in size.
6. Words and numbers
How a content file is written
The vast majority of what you will be adding, such as a new stop, are simple text files in a format called JSON. (Technically, it’s JSONC, “JSON with comments”, since plain JSON doesn’t allow comments. That’s why the files end in .jsonc.)
Here is part of a stop’s file:
{
	// how many moves the player gets
	"moves": 20,
	"name": "Giza",
	"amulets": ["ankh", "scarab", "eye", "lotus"]
}
Each line between the curly brackets { } is one setting. It is made up of two halves with a colon between them:
- The left side is the key. This is the game’s internal name for this particular piece of data (
"moves"). Don’t change it, since the game looks for exactly this name. - The right side is the value. This is the actual data and the part you will be changing: in this case, how many moves the player gets (
20).
There are a few different kinds of values:
| Kind | Looks like | Used for |
|---|---|---|
| Text (a string) | "Giza", between double quotes | names, sentences, ids |
| A number | 20, without quotes | moves, prices, amounts |
| Yes or no (a boolean) | true or false, without quotes | turning something on or off |
| A list | ["ankh", "scarab"], between square brackets, with commas in between | several values of the same kind |
| A group | { "stars": 20 }, between curly brackets | several settings that belong together |
There are a few rules to keep the file readable for the build:
- Put a comma after each setting, except for the last one.
- Lines that start with
//are comments. These are notes for people and the game simply ignores them. - Don’t delete a bracket, a quote mark or a colon.
- An apostrophe is fine inside of text (Khufu’s). A double quote (
") inside of text is not, since it would end the text early.
If you get one of these wrong, don’t worry: the build tells you the file and the line.
Every word on the screens: content/text.jsonc
Every word the game’s own screens show can be found in one file, content/text.jsonc. It is grouped by screen: the title screen, the Menu, the buttons, the shops, the scrolls for winning and losing, How to play and the banners.
"win": {
	"title": "{stop} is gilded",
	"lede": "The floor gleamed like the sun at noon.",
Change the text on the right and leave the key on the left alone.
There are a few special marks you can use:
| Mark | What it does | Example |
|---|---|---|
{stop}, {n} and other words in curly brackets | The game fills in a name or a number here. Keep them, but feel free to move them around within the sentence. | "{stop} is gilded" shows “Giza is gilded” |
{n|stone|stones} | Shows the first word when the number is 1 and the second one otherwise. | “1 stone”, “3 stones” |
**bold**, *italic* | Makes words bold or slanted. | |
\n | Starts a new line. |
If you mistype a key, the build tells you which one it is and suggests the right one.
The names and descriptions of stops, relics, trials, river events, shop items, boons, badges, curses, omens and looks are not in this file, though. Those can be found in each thing’s own file.
A stop’s name, subtitle and history note
Each stop is one file in content/stops/. This is what the beginning of one looks like:
{
	"id": "giza",
	"name": "Giza",
	"subtitle": "The house of Khufu",
	"history": "At Giza we stood beneath the Great Pyramid of Khufu ...",
	"moves": 20,
Change the text between the quotes. Once people have played, leave the id alone, since saves remember stops by it.
The history note is written as a travel journal (“we came to Karnak at noon”) and its facts should be true: prefer the plainly documented fact to the colourful legend. If a note is too long to fit beside the board, the game shows the first few lines and a “Read on” button, so length is never really a problem. Two or three sentences read best, though.
How many moves a stop gives
In the same file: "moves": 20. This is, essentially, the stop’s difficulty. More moves is easier. Two or three moves more or less can make quite the difference! The game adjusts this for the difficulty and the size of the screen by itself, so change it a little at a time.
The numbers that tune the game: content/settings.jsonc
This file contains the numbers for the whole game, each with a comment beside it. These are the ones you are most likely to change:
| Key | What it sets |
|---|---|
stops_open_at_start | How many stops are open right from the beginning. |
staging | At which stop each part of the game arrives on a first journey and whether new players get them one at a time. |
stars | How many moves have to be left over for two stars and for three stars. |
difficulty | For Relaxed, Normal, Hard and Pharaoh: the moves, how often badges fall and how soon hints appear. |
river_channel | The colours of the Nile running down an Omega board and its reeds. |
river_event_percent, trial_offer_percent | How often river events and trials come up, out of 100. |
earnings, omens, seals, persistence | The rewards and how much kinder the game gets after a failed try. |
Important: the four groups in
difficultyalso give the difficulties their names. Never rename one, since saves and curses rely on them!
An example: a gentler game for young players. In settings.jsonc, open every stop at once and bring in the game’s parts all together:
"stops_open_at_start": 12,
"staging": {
	"learning_pace": "everything now",
Then, in the difficulty group, give Normal a few more moves. After you’ve built it, a new player can go anywhere right from the start. Nothing else changes.
In the engine: the numbers are read by
settings()inengine/build.pyand reach the code asCONTENT.settings. Part 2, chapter 11 explains which numbers tune what.
Prices
- Anubis’s stall (help for one stop):
content/stall/, the"price". - The Treasury (lasting upgrades):
content/treasury/, the"prices"list, with one price per level, like[300, 600, 1200].
7. Adding something new
No matter what you’re adding, whether it’s a stop, an amulet or a new relic, it’s always done the same way:
- Make it with
scripts/new.py(see chapter 2), or copy the nearest existing file by hand. - Rename the copy with the next number and a new name, if you copied it by hand.
new.pydoes this for you. - Change its
idand whatever else you need. - Build and try it out in
dist/try-it.html.
The number at the front of a file name decides its place in the order. 13-koptos.jsonc comes after 12-alexandria.jsonc, meaning Koptos would be the thirteenth stop.
A new stop
python3 scripts/new.py stop koptos writes content/stops/13-koptos.jsonc and copies Saqqara’s pictures for it, so it works right away. Then change these:
| Key | What it is |
|---|---|
name, subtitle, history, moves | See chapter 6. |
amulets | Four to six amulet ids, from content/amulets/ or pictures you’ve added. Make sure they differ in colour and in shape. |
floor_plan | The shape of the floor (see below). |
map_position | Where the stop sits on the Nile map: y goes from about 45 at the coast to 506 at Abu Simbel. label decides whether its name is shown on the "left" or the "right" of the marker. |
music | A key, a scale and an instrument (harp, lyre, oud, flute or bell). The game makes up the music as you play, in that key! |
seals | Three small challenges, like {"text": "Win without spending a boon", "when": {"win_without_boons": true}}. text is what the player reads and when is what the game checks; the content reference lists every condition. |
Draw over images/backdrops/koptos.svg and images/boards/koptos.svg whenever you like, or share another stop’s pictures with "scenery": "giza".
The floor plan
The floor plan is a list of eight lines with eight characters each. Every character stands for one square:
| Character | Square |
|---|---|
. | a gap: there is no square here |
0 | stone that is already gold |
1 | bare stone, which one match gilds |
2 | thick stone, which needs two matches |
For instance, a floor in the shape of a ring would look like this:
"floor_plan": [
	"..1111..",
	".122221.",
	"11....11",
	"12....21",
	"12....21",
	"11....11",
	".122221.",
	"..1111.."
],
Every stone has to be matchable. Since a match is three in a row, every stone needs at least two more squares next to it in a line, either across or down. In the ring above, every stone has that. If one of them didn’t, the build would stop and tell you so, for example: “the square at row 3, column 1 can never be matched”.
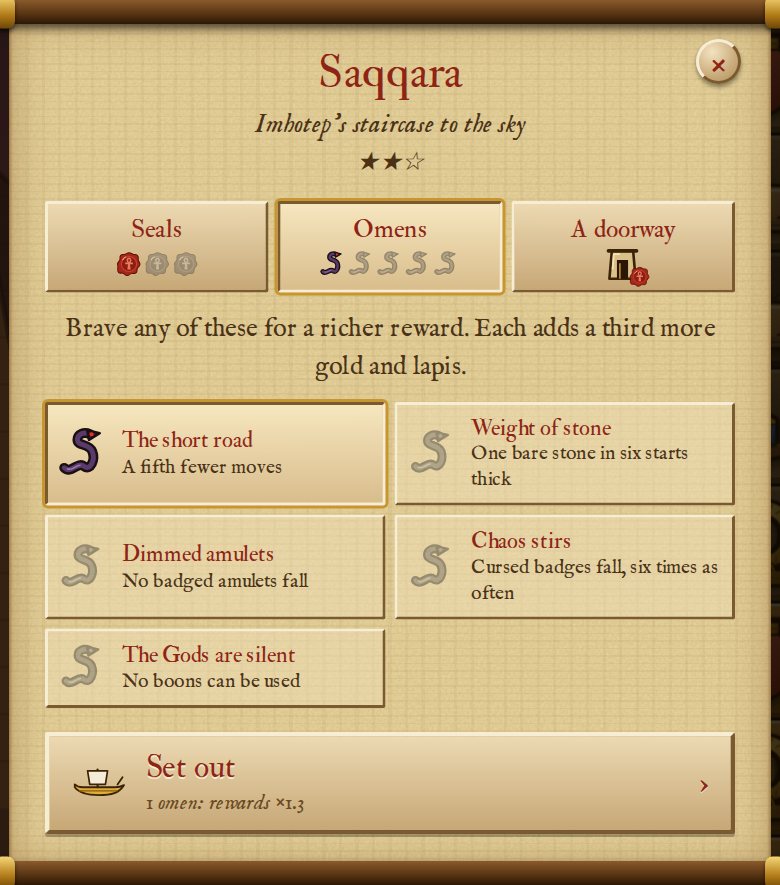
A stop’s card on the map, once the stop has been gilded. Its three seals come from the stop’s file; the omens and the doorway come from files of their own.
A new amulet
python3 scripts/new.py amulet golden-falcon writes content/amulets/NN-golden-falcon.jsonc (its name, its plural and what the symbol meant, all shown in How to play) and a picture to draw over in images/amulets/. Then add golden-falcon to a stop’s amulets. Until you do that, it won’t show up anywhere.
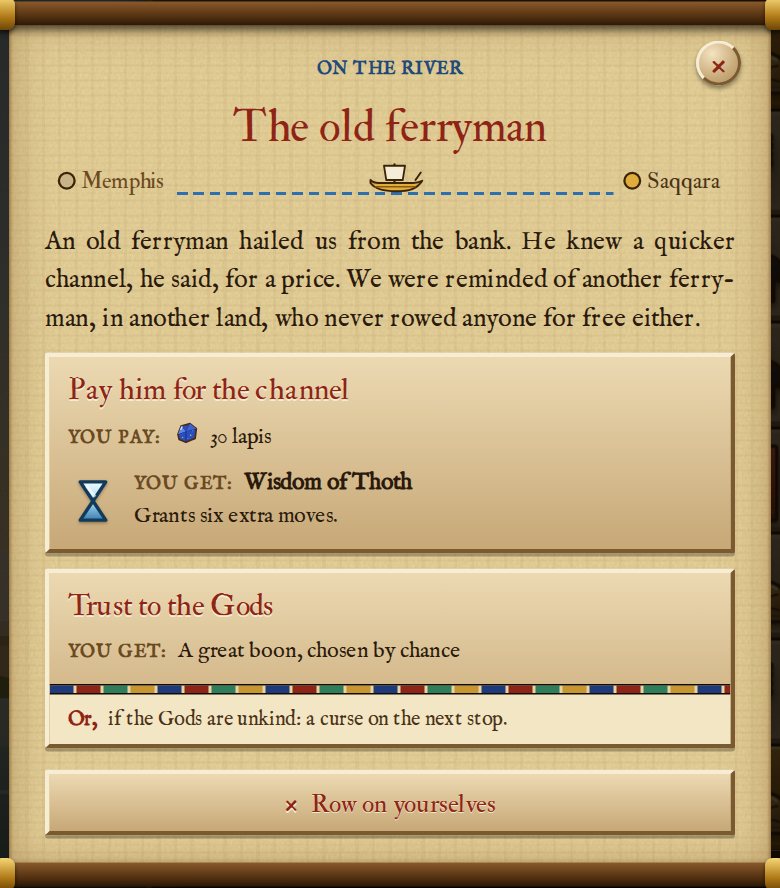
A new river event
River events happen between two stops. There are two kinds of them:
- A puzzle (
new.py event-puzzle) is a small board with a goal: gild the floor, collect a certain number of one amulet or reach a score. - A choice (
new.py event-choice) offers two or three things to do, each with a cost or a gift. It’s a good idea to always include one that simply lets the player sail on.
A new tomb, temple or oasis
python3 scripts/new.py chamber my-tomb, then set:
| Key | What it is |
|---|---|
at | The id of the stop it’s beside. A stop can only have one chamber. |
name, text | Its name and what the player reads before going in. |
moves, floor_plan | The same as for a stop. In the floor plan, s is a stone with an amulet buried in sand. |
reward | What the player gets for gilding it. |
setting | "tomb" for a dim room lit by torches, "oasis" for daylight. In an oasis, use w for an amulet under water. |
Sand, water and other covers
A cover is something that sits atop an amulet and keeps it in place, like sand or water. The amulet can’t be moved until the player has broken the cover by making matches. The game has two covers, sand and water, each a file in content/covers/ with its picture in images/covers/.
A cover’s file says what it’s called, what How to play says about it, the line shown when a player tries to move a covered amulet, the line on a chamber’s card, its two letters in floor plans (s and S for sand), its sound and the colours it bursts into. You can make a new cover (ash, for instance, or amber) simply by making a new file, with no code at all.
A cover can also behave differently:
| Key | What it does |
|---|---|
layers | How many hits it takes to break. With 2, it needs two matches and a second picture (<id>-1.svg) shows it cracked. |
broken_by | "beside": a match next to it breaks it, like sand. "on": only something that clears its own square does. |
matches | Whether the amulet under it can still be part of a match (see below). |
spreads | true: after every move that didn’t break any of it, it grows over one more amulet next to it, like ivy. |
What matches means. Imagine a row of three blue amulets where the one in the middle is covered. With "matches": false (sand and water), the covered amulet is stuck: it doesn’t count, so nothing happens. With "matches": true (like a net), the covered amulet still counts: the row is a match, the two free amulets are cleared and the covered one stays where it is but loses a layer of its cover instead. In short, false means “break me before you can use me”, whereas true means “you can use me and using me breaks me”.
The content reference lists every setting a cover has. Tessera’s example game, the engine this game is built on, shows all of them in action: amber, a net and ivy.
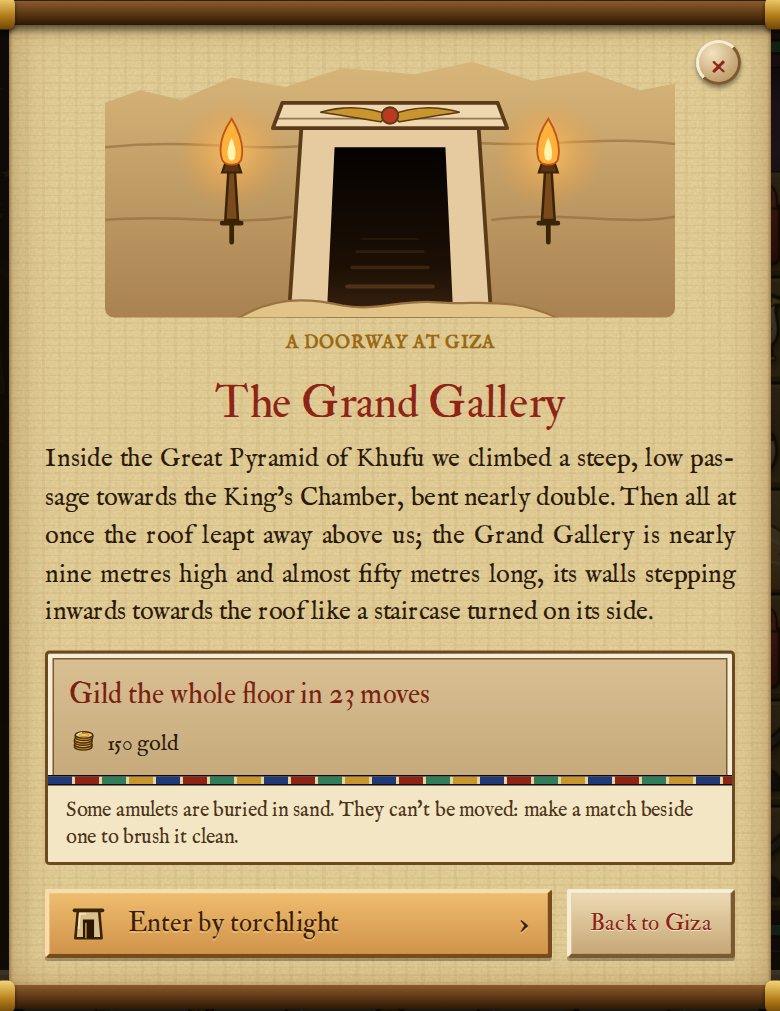
A tomb’s doorway. The picture, the note and the task all come from the chamber’s file.
A new relic
new.py relic, then set its name, its description and found_when: what the player has to do, like {"stops_won": 10} or {"best_cascade": 5}. Every condition you list has to be met. Its picture is images/icons/relics/<id>.svg, or another icon named in "icon".
An example: a relic for the brave, found by winning twenty stops on Hard (or Pharaoh) and holding 500 lapis at once. The conditions count across all of the player’s journeys:
"id": "sphinx-seal",
"name": "Seal of the sphinx",
"description": "Win twenty stops on Hard and hold 500 lapis at once.",
"found_when": {"hard_wins": 20, "lapis_held": 500},
"reward": {"lapis": 25}
The content reference lists every condition.
A new trial
new.py trial, then set its goal (clear so many amulets, make specials, make a long cascade, win with moves to spare and so on), its target (how many), the words and the boon it gives.
A new boon, badge, curse or omen
These four all work in a similar way. Each of them is a file and each of them picks what it does from a list the game already knows. The list is written in the comments of every such file.
- A boon (
content/boons/) is a power the player keeps and uses whenever they like. It has aname, ashortname for its button (about eight letters), adescriptionand aneffectsuch as"extra_moves"with anamount. Give it out as a trial’s prize, in Anubis’s stall or as a river event’s reward. Its picture isimages/icons/boons/<id>.svg. - A badge (
content/badges/) is a mark an amulet can wear when it falls in. It has aname, a few words on how itlooks(so players can tell badges apart), aneffectsuch as"gild_stones", aweight(how often it turns up compared to the others) and a glowcolour. Draw it inimages/badges/. - A curse (
content/curses/) is what a failed trial costs at the next stop. It has aneffectsuch as"thick_stones"and itsstrengthon each difficulty. Keep Relaxed at 0. One that buries amulets can name its"cover", either"sand"or"water". - An omen (
content/omens/) is a hardship a player may choose to face for a bigger reward. It picks from the same list as the curses, with oneamount.
In the words, write {n} wherever the number should go: "{n} fewer moves". If the effect you’d like isn’t in the list, chapter 9 shows you how to add one.
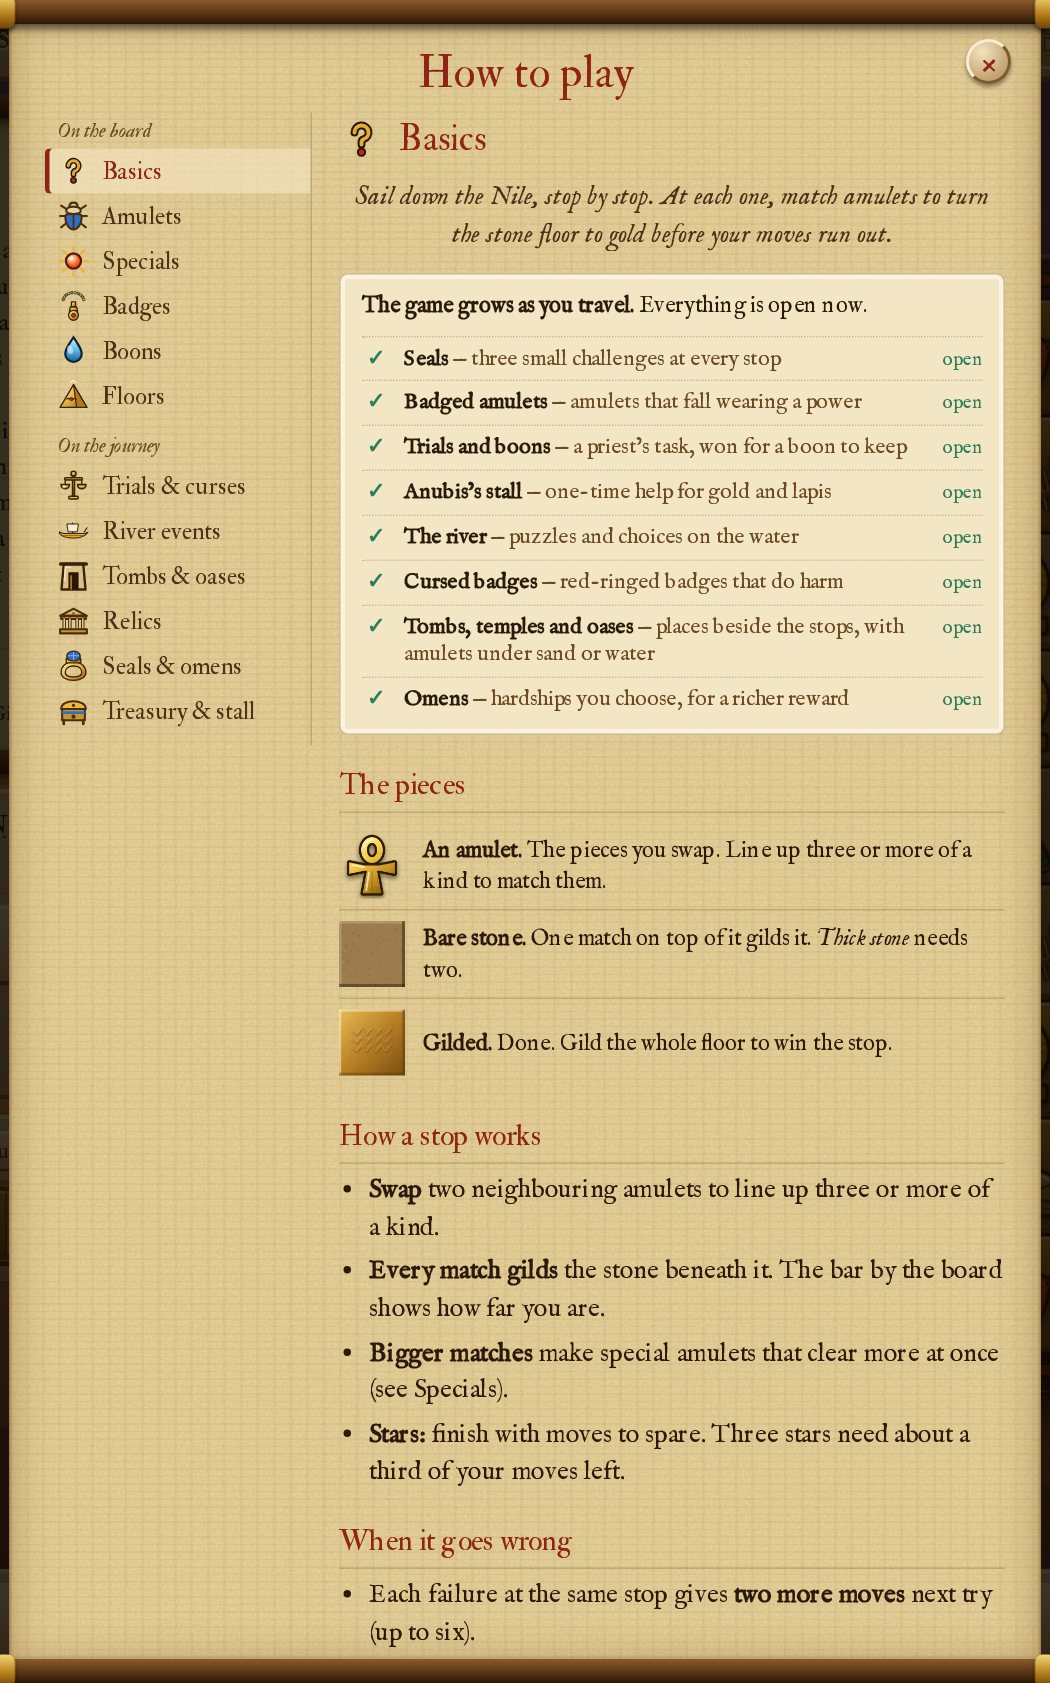
Every boon, badge, curse and omen appears in How to play all by itself, with its picture and its words:
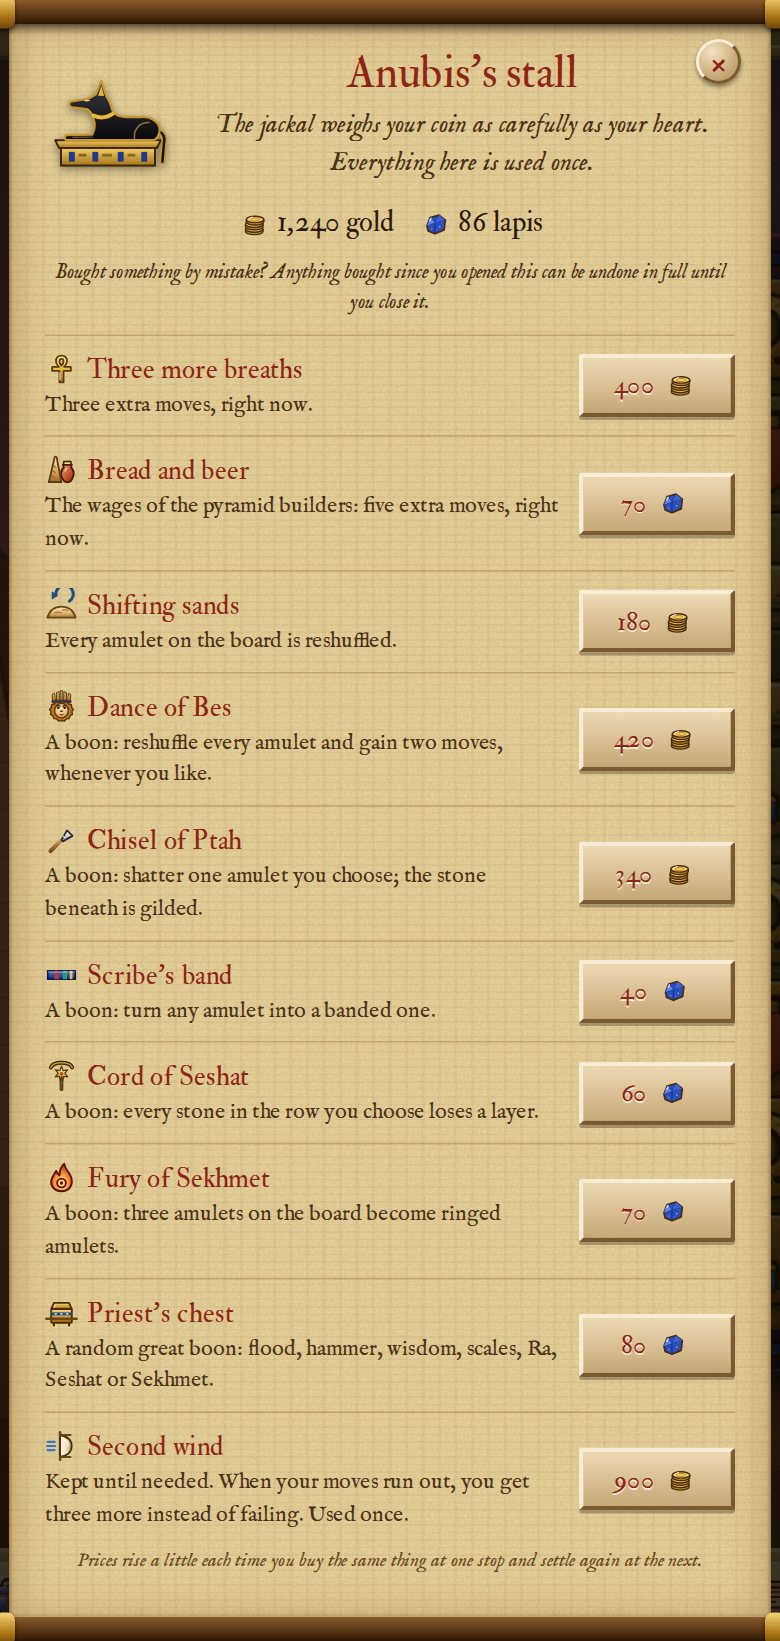
Something for the shops
- Anubis’s stall (
new.py stall) sells help for a single stop: more moves right now, a reshuffle, a Second wind or a boon. - The Treasury (
new.py upgrade) sells lasting upgrades, with one price per level and aneffectsuch asextra_movesorwin_gold.
New looks
Looks don’t change anything but how the game looks. Players earn them by playing. Each look has unlocked_by, which describes what the player has to do to unlock it, such as {"stars": 20} (earn twenty stars).
- An amulet set (
new.py amulet-set) recolours the amulets withcolour_changes:hue_shift,saturation,brightnessand so on. Shift the colours rather than taking them away, or every amulet ends up looking the same. - An amulet set with pictures of its own draws the amulets completely differently instead, for instance as pixel art. Make a folder
images/amulet-sets/<the set's id>/and put a picture in it for each amulet, named after the amulet (scarab.png,ankh.pngand so on). Any amulet you leave out keeps its usual picture. For pixel art, draw them small (16 × 16 works nicely) and add"pixel_art": trueto the set’s file, so the game keeps every pixel crisp and square rather than blurring them when it makes them bigger. The game’s own four sets of this kind (engraved plates, Naqada pots, Djoser’s tiles and cloisonné) are drawn by a script,tools/amulet-sets/draw.py, from one simple outline of every amulet intools/amulet-sets/shapes.py. If you add an amulet, give it an outline there too and run the script. Then it gets a picture in all four sets. If you don’t, it just keeps its usual picture in them. - A look for sale. Any look can have a price too. Give it
"currency": "lapis"(or"gold") and"price": 300. Customise then shows the price on its card. Players buy it with a tap. Until they close Customise they can change their mind and take it back. If the look has nounlocked_by, buying it is the only way to get it. If it has one, players can earn it or buy it, whichever comes first. The engraved plates, Djoser’s tiles and cloisonné are sold this way. - A floor set (
new.py floor-set) is a folder of floor pictures. Check it against every stop’s amulets: a blue floor hides a blue scarab! - A frame or a sparkle is just a few colours.
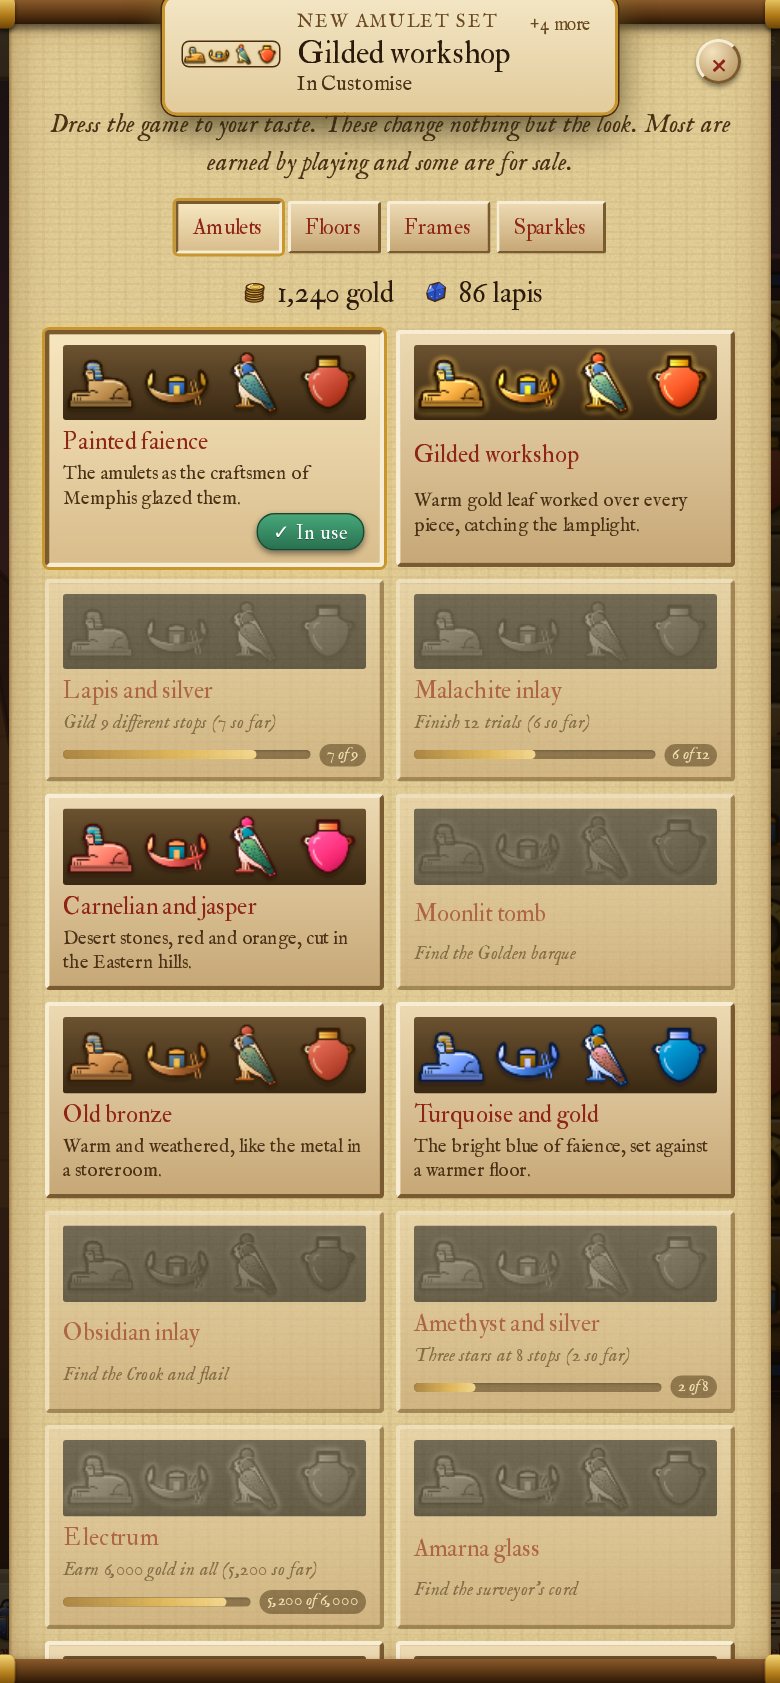
Customise shows every look. A locked one says what opens it and how far along the player is.
A new floor shape
new.py floor-shape makes a floor plan that several stops can share. Its move_multiplier gives harder shapes a few more moves (1.1 is ten per cent more). To use it, list its id in a stop’s shared_floor_shapes.
Your own sounds and music
Every sound in the game is made while you play (the plucked strings, the bells, the click of stone) and so is the music, in each stop’s own key and instrument. You don’t have to change any of it. But if you have recordings you’d rather use, the game can play those instead.
- Sounds: make a folder called
sounds/in the game’s folder (next toimages/, not inside it) and put a recording in it for each sound you’d like to replace, named after that sound:match.mp3,gild.wavand so on. The names are listed at the end of the content reference (“Sounds”). If you misspell one, the build tells you and suggests the right one. - Music: make a folder called
music/and put a piece in it named after a stop, such asgiza.mp3. It then plays, over and over, at Giza. A piece calleddefault.mp3plays at every stop that has none of its own. Stops without either keep the music the game makes up. - Build and play.
A few things to know:
.mp3,.wav,.oggand.m4aall work. I would use.mp3, since every browser plays it.- Your recordings go inside the game file, like the pictures. So keep them short and small: a whole piece of music can easily make the game several megabytes bigger, which every player then has to download.
- The volume sliders, the mute buttons and the muffling under a scroll work for recordings just as they do for the made-up sounds. What recordings can’t do is follow the game: the made-up music gets tenser as your moves run out and brighter as the floor turns to gold. Also, the sounds of a match are tuned to the music’s chord. A recording always sounds the same.
- Only use recordings you’re allowed to share and write down where they came from in
images/CREDITS.md, just as you would for a picture.
8. Is it fair? Checking the balance
What you’ll do: let a bot play your stops many times, to find out how hard they are.
Eyeballing the difficulty is bad practice. Your own results will differ from run to run and, as you keep playing, you will naturally get better at the game. Thus, it’s best to let a bot play instead: even if it’s not particularly smart, it can, at the very least, produce semi-reproducible results. The game comes with one such bot. It plays a stop many times and counts how often it wins. To run it, you need Node.js, a free program for running JavaScript.
- Install Node.js, if you haven’t already.
In the terminal, in the game’s folder, type:
node engine/tools/journey-sim.js 1 60This plays sixty first journeys (
60) on Normal (1, since it starts counting from 0), the way a new player would get to know them.- Now wait a minute or two. The bot is quick, but it does play quite a lot of games!
You should see: for each board size, how often the bot won each stop on its first try, in per cent, one number per stop in the order of the journey, followed by the average.
What to aim for: I aimed for a win rate of about 65 to 75 per cent for the bot on Normal, with the early stops a little easier than the later ones. In real-world terms, this seems to equate to a win rate of about 25 to 75 per cent for players, depending on their skill level. If your stop is far off, change its moves by one or two and run the bot again.
For a river event puzzle or a chamber, node engine/tools/events-sim.js does the same. Here, the aim is somewhere between half and nine in ten (50 to 90 per cent).
9. When the list isn’t enough: a little code
All that we’ve worked on thus far has been things that the engine has built into it: a boon’s effect, a badge’s effect and a curse’s effect are all one name from a list the engine already knows. However, there may be times where you wish to add something that I did not think of adding to this game. If that is the situation you’re finding yourself in, then you’ll want to read this chapter.
You will be required to write a bit of code, namely a few lines of JavaScript (the programming language the engine is written in)! But you don’t have to be an actual, proper programmer to do any of this. Most new things start out as a copy of something that already does something similar. On top of that, I’ll explain every line you will come across.
The bits of JavaScript you’ll come across
Before we look at any real code, here are the handful of things you will see in it again and again. You don’t have to learn them by heart; just come back to this section whenever a line doesn’t make sense to you.
core: the game that is being played. Almost every rule is handed something called core. This is one big bundle containing everything about the stop that is being played right now: the floor, the amulets on it, how many moves are left and so forth. A rule is given core so that it can look at the board and change it. (The name comes from the fact that it is the core of the game: the part that knows the rules, without any of the drawing or the sound.)
The dot: “the part of … called …”. A dot opens up a bundle and picks one thing out of it:
core.movesLeft   // the part of core called movesLeft: the number of moves left
core.floor       // the part of core called floor: the stone of every square
Square brackets: “item number … of a list”. Many things in core are lists with one entry per square of the board. Square brackets pick one entry out of such a list:
core.floor[12]   // the stone on square number 12
core.floor[sq]   // the stone on square number sq, whichever square sq is
Names for things. const gives a name to something you have worked out, so that you can use it again further down. let does the same for something that is going to change later on:
const col = colOf(sq);   // col is now the column of square sq
let n = 0;               // n starts at 0 and can be changed later
Changing a number. A single = means “becomes”. There are also a few shorthands:
| Written | Means |
|---|---|
core.floor[sq] = 1; | the stone on square sq becomes 1 (bare) |
core.movesLeft += 3; | three more moves (the moves left become what they were, plus 3) |
core.floor[sq]--; | one less: the stone loses a layer |
Asking questions. These give you true or false, which you’ll need for choosing squares and for if:
| Written | Asks | For example |
|---|---|---|
=== | is it exactly the same? (three = signs, since one already means “becomes”) | core.floor[sq] === 1: is this a bare stone? |
!== | is it different? | core.floor[sq] !== 0: is it not gilded yet? |
>, < | is it more? less? | core.floor[sq] > 1: is it thick? |
&& | and: are both true? | core.mask[sq] && core.floor[sq] > 1: is it part of the floor and thick? |
|| | or: is at least one of them true? | |
! | not: turns true into false and the other way round | !thick.length: is the list empty? |
Doing something: a function. A function is a set of steps that you can hand things to. The arrow => separates what the function is given from what it does, so you can read it as “given …, do …”:
(core, n) => pickSome(bareStones(core), n)   // given core and n, pick n bare stones
sq => thicken(core, sq)                      // given a square, make it thick
The names before the arrow are what the function is given; they’re simply names that the function uses for them while it runs. When there is only one of them, the brackets can be left out, as in sq => …. When a function needs more than one step, its steps go between { and }, one per line:
async (b, sq) => {
	const col = colOf(sq);
	...
}
Groups of named parts, between { and }, just like in a content file. The big lists in this chapter (BOON_EFFECTS, BADGE_POWERS and HARDSHIPS) are groups like this, with one entry per effect. An entry can itself contain functions:
thick_edges: {                 // the entry's name, which a content file uses
	board: (core, n) => ...,   // its part called board: a function
},
Going through a list. A list comes with a few ready-made helpers of its own, which you call with a dot. Each of them is handed a small function that it runs once for every item in the list:
| Written | Does | For example |
|---|---|---|
list.filter(test) | keeps only the items for which the test is true | squares.filter(sq => core.floor[sq] === 1): only the bare stones |
list.forEach(step) | does the step once for every item | squares.forEach(sq => thicken(core, sq)): make every one of them thick |
list.length | how many items there are | thick.length |
Repeating and choosing.
for (let row = 0; row < ROWS; row++) { ... }   // runs the lines inside once for every row
if (core.movesLeft < 5) { ... }                // runs the lines inside only if fewer than 5 moves are left
Waiting. await settle() waits until the amulets have stopped moving before carrying on. A function that has to wait like this is marked with async at its beginning.
The small print. A line usually ends with a ;, much like a sentence ends with a full stop. Everything after // is a comment: a note for people that the game ignores.
The board, as the code sees it
To the code, the board is essentially one long list of squares, row after row. A board that is eight squares wide numbers them like this:
 0  1  2  3  4  5  6  7
 8  9 10 11 12 13 14 15
16 17 18 ...
A square’s number is called sq. For each square, there are three lists that describe what is there:
| The list | What it tells you | For example |
|---|---|---|
core.mask[sq] | whether this square is part of the floor at all | false for a gap |
core.floor[sq] | how many layers of stone are left | 0 gilded, 1 bare, 2 thick |
core.cells[sq] | the amulet on it | its kind and any special, badge or cover; or nothing |
COLS is the number of columns and ROWS the number of rows. Boards are often taller than they are wide, so never assume the two are the same.
That said, you will rarely have to work out rows and columns yourself, since the helpers below do that for you.
Helpers: the words the rules are written in
A helper is a small, ready-made function with a plain name that does one thing every rule needs: finding squares, choosing some of them or changing them. A new rule is usually just two or three helpers in a row, so it reads almost like it would in plain words.
The helpers can be found at the top of engine/src/01-core.js, under “helpers”. You can use them anywhere in the game’s code.
Finding squares
| Helper | What it gives you |
|---|---|
rowOf(sq), colOf(sq) | the row or the column of a square |
squareAt(row, col) | the square at that row and column, or -1 if that is off the board |
neighbours(sq) | the four squares next to it: above, below, left and right |
around(sq, reach) | every square near it, including itself. A reach of 1 gives the 3 × 3 around it; 2 gives 5 × 5. |
rowSquares(row), colSquares(col) | every square in a row or in a column |
diagonalSquares(sq) | every square on both diagonals through it |
Finding what’s on them
| Helper | What it gives you |
|---|---|
bareStones(core), thickStones(core) | the bare stones or the thick ones |
stonesLeft(core) | every stone that hasn’t been gilded yet |
gildedSquares(core) | every gilded square |
edgeOfFloor(core) | the squares around the edge of the floor |
plainAmulets(core) | the amulets without a special, badge or cover |
coveredAmulets(core) | the amulets under any cover |
coveredAmulets(core, 'water') | the amulets under one particular cover |
amuletsOfType(core, type) | every amulet of one kind |
squaresWhere(core, (sq, tile) => ...) | anything else. You write the test yourself, as a small function: it is given each floor square and the amulet on it. It then answers true or false. For example, squaresWhere(core, (sq, tile) => tile && tile.special) gives every special amulet. |
Choosing and changing
| Helper | What it does |
|---|---|
pickSome(list, n) | picks n of the list at random |
pickOne(list) | picks one of the list at random |
thicken(core, sq) | makes a bare stone thick |
coverAmulet(core, sq, 'sand') | puts an amulet under a cover |
uncover(tile) | frees an amulet from its cover |
coverAmulets(core, n, 'sand') | covers n plain amulets at random, but never so many that the player has no move left |
makeSpecial(core, sq, 'bomb') | turns an amulet into a special (h, v, bomb, star or sun) or gives it a badge |
An example. This is a whole curse written with helpers. It is the engine’s thick_edges, which makes “some bare stones along the edge of the floor start out thick”. When a stop with this curse begins, the engine hands its board function two things. The first is core, the board that has just been filled. The second is n, the curse’s strength (how many stones to thicken). Written out one step per line, it looks like this:
thick_edges: {
	board: (core, n) => {
		const edge = edgeOfFloor(core);
		const bare = edge.filter(sq => core.floor[sq] === 1);
		const chosen = pickSome(bare, n);
		chosen.forEach(sq => thicken(core, sq));
	},
},| Line | What it does |
|---|---|
thick_edges: { | The curse’s name. A curse file picks it with "effect": "thick_edges". |
board: (core, n) => { | The part that changes the board. Given core and n, it does the steps below. |
const edge = edgeOfFloor(core); | Takes every square along the edge of the floor and calls that list edge. |
const bare = edge.filter(sq => core.floor[sq] === 1); | Goes through edge and keeps only the squares whose stone is exactly 1, the bare ones. That list is called bare. |
const chosen = pickSome(bare, n); | Picks n of those at random and calls them chosen. |
chosen.forEach(sq => thicken(core, sq)); | For every chosen square, makes its stone thick. |
}, | The end of the function, then the end of the entry. |
In the engine itself, the same curse is written in one go, without the names in between. It does exactly the same thing; it’s just shorter. You read it from the inside out:
thick_edges: {
	board: (core, n) =>
		pickSome(
			edgeOfFloor(core).filter(sq => core.floor[sq] === 1),
			n,
		).forEach(sq => thicken(core, sq)),
},
Both ways of writing it work, so use whichever you find easier to read!
No curse of this game uses thick_edges yet, but a curse file with "effect": "thick_edges" would.
Reading a boon that already exists
Before making something new, it helps to read something that already works. A boon file names which effect it uses, with "effect". The effect itself is an entry in the list BOON_EFFECTS, in engine/src/game/07-trials-boons.js. This is the one behind the Wisdom of Thoth:
// n more moves
extra_moves: {
	target: false,
	amount: 6,
	use: async b => {
		core.movesLeft += b.n;
		updateHUD();
		sfx('moves');
		boonPopup(b, false, { x: COLS / 2, y: ROWS / 2, life: 1.6, size: 0.6, col: '#bfe8ff' });
		rings.push({ x: COLS / 2 - 0.5, y: ROWS / 2 - 0.5, life: 1, big: true });
	},
},| Line | What it means |
|---|---|
// n more moves | A comment: a note for people, saying what the effect does. |
extra_moves: { | The effect’s name, which a boon file uses in "effect". |
target: false, | The player doesn’t choose a square. With true, the board glows gold and waits for the player to tap a square (as in the picture below), which is then handed to use as sq. |
amount: 6, | The number used when a boon file doesn’t give an amount of its own. |
use: async b => { | What happens when the player uses the boon. The function is given b, the boon itself; b.n is its amount. It’s marked async because boons are allowed to wait (this one doesn’t need to). |
core.movesLeft += b.n; | The rule itself: the moves left go up by the boon’s amount. |
updateHUD(); | From here on, it’s the show. This updates the numbers at the top of the screen, so the player sees the new moves. |
sfx('moves'); | Plays the sound called moves. |
boonPopup(b, false, { ... }); | Floats the boon’s words (its popup) up over the board. false means “there was something to do”, so the normal words are used. The group in { } says where and how: x and y are the position, counted in squares from the top left (COLS / 2 is halfway across the board), life how many seconds the words stay, size how big they are and col their colour. |
rings.push({ ... }); | Adds a ring of light to the list of rings the game draws, in the middle of the board. big: true makes it a big one. |
}, | The end of use, then the end of the entry. |
Every effect is built like this: first comes the rule, then the show.
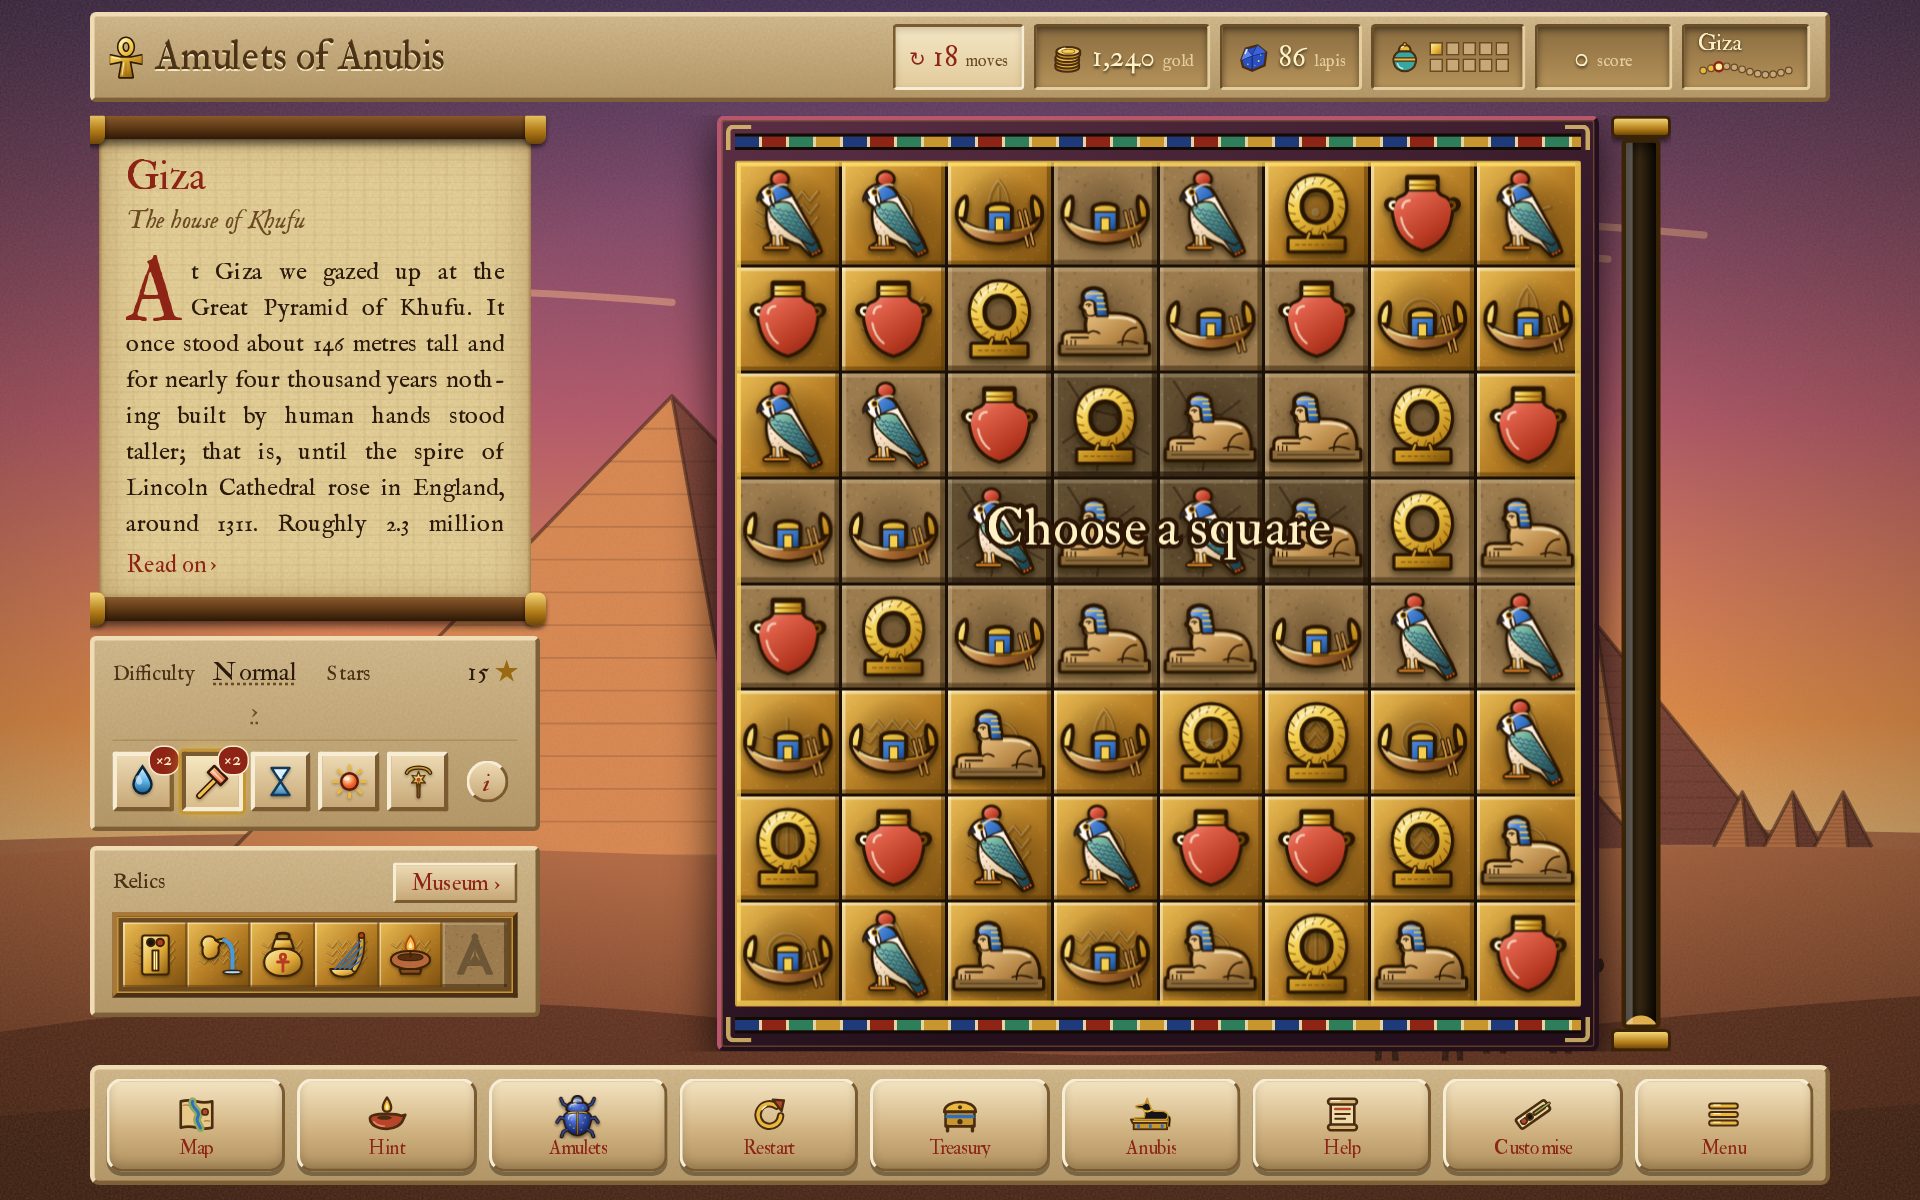
A boon with target: true, waiting for the player to choose a square.
Making your own: the Blessing of Hapi
What you’ll do: make a new boon, the Blessing of Hapi, which turns every thick stone in a column into bare stone. Time: about 20 minutes.
Hapi was the God of the Nile’s yearly flood, the water that softened the fields. So let’s make a boon in His name that softens every thick stone in the column the player chooses, turning it into plain bare stone. None of the effects in the list does this yet. The Cord of Seshat, however, is pretty close: it works on the row the player chooses. So we copy the idea and change it.
Step 1: adding the effect
- Open
engine/src/game/07-trials-boons.js. - Find
cord_row:inBOON_EFFECTS. This is the Cord of Seshat’s effect. - Right above it, add these lines:
// every thick stone in the chosen column becomes bare stone
thin_column: {
	target: true,
	use: async (b, sq) => {
		const col = colOf(sq);
		const thick = colSquares(col).filter(j => core.mask[j] && core.floor[j] > 1);
		thick.forEach(j => {
			core.floor[j] = 1;
			flashes.set(j, 1);
		});
		bgDirty = true;
		beams.push({ dir: 'v', idx: col, life: 1 });
		sfx('blessing');
		boonPopup(b, !thick.length, { x: col + 0.5, y: 0.8, life: 1.6, size: 0.46, col: '#bfe8ff' });
		updateHUD();
		await settle();
	},
},
This is what each line does:
| Line | What it does |
|---|---|
thin_column: { | The name a boon file will use in "effect". |
target: true, | The player chooses a square first. |
use: async (b, sq) => { | What happens when it’s used. Because of target: true, the function is given the square the player chose, as sq, as well as the boon, b. It’s async because it waits at the end. |
const col = colOf(sq); | Finds the column of the chosen square and calls it col. |
const thick = colSquares(col).filter(j => ...); | Takes every square of that column from top to bottom. It then keeps only those that are part of the floor and thick (core.mask[j] && core.floor[j] > 1). That list is called thick. The squares are called j here, since the name sq is already taken by the chosen square. |
thick.forEach(j => { ... }); | Does the two lines inside once for each of those squares: |
core.floor[j] = 1; | …the stone becomes bare (the rule)… |
flashes.set(j, 1); | …and a flash of light appears on it. |
bgDirty = true; | The floor is painted only once and then kept, since that’s much faster. This line tells the game that the floor has changed, so it has to be painted again. |
beams.push({ dir: 'v', idx: col, life: 1 }); | Draws a beam of light down ('v', for vertical) column number col. |
sfx('blessing'); | Plays the sound called blessing. |
boonPopup(b, !thick.length, { ... }); | Shows the boon’s words over the column. !thick.length is true when the list thick is empty, in which case the boon’s “nothing to do” words (popup_when_nothing) are shown instead. |
updateHUD(); | Updates the numbers at the top of the screen. |
await settle(); | Waits until the board is still before the player can move again. |
There’s no amount line, since this boon has no number to set. Notice also that the rule itself is just one line (core.floor[j] = 1;); the rest makes it feel like something happened. A boon without a show works, but it feels broken.
Step 2: making the boon
- Type
python3 scripts/new.py boon hapi. It writescontent/boons/11-hapi.jsonc, a working boon for you to change. Set:
"name": "Blessing of Hapi",
"short": "Hapi",
"description": "Softens every thick stone in the column you choose.",
"effect": "thin_column",
"popup": "Hapi softens the stone",
"popup_when_nothing": "No thick stone there",
- Delete the
"amount"line and keep the words free of{n}, since this boon has no number. The build reads the effect names from the code, so it acceptsthin_columnas soon as your entry is there.
Step 3: a picture and a way to be found
Draw images/icons/boons/hapi.svg (copy another boon’s icon to start from), or write "icon": "flood" to borrow one for now. Then give the boon out somewhere: as a trial’s prize ("boon": "hapi" in a trial file), in Anubis’s stall or as a river event’s reward.
Step 4: checking it
- Build.
- Open
dist/try-it.html. Try-out mode gives you one of every boon, so Hapi is in the row beside the board. - Pick a stop with thick stone, click Hapi and click a column.
Run the smoke test, which plays the game for a moment and tells you if anything went wrong:
node engine/tools/screenshots/smoke.mjs
You should see: the thick stones in the column turn bare and the smoke test ends with No errors. Your new boon works!
Finally, add a line for thin_column to the list of effects in the comment at the top of the boon files and in scripts/new.py‘s boon template, so the next person knows it exists.
Useful things to call
These are the pieces the existing entries use and the ones you are most likely to want.
| To… | Write |
|---|---|
| change the moves | core.movesLeft += 3; |
| take a layer off a stone | core.floor[j]--; and then bgDirty = true; |
| clear amulets as if they had been matched (gilding under them, with cascades after) | await cascade(null, [j1, j2, ...], true); |
| light up a square | flashes.set(j, 1); or burst(column, row, 4); for sparks |
| draw a beam along a row or column | beams.push({ dir: 'h', idx: row, life: 1 }); ('v' for a column) |
| send golden orbs flying from one square to another | orbs.push({ from: j, to: j2, t: 0, dur: 0.5 }); |
| play a sound | sfx('blessing'), sfx('crack'), sfx('bomb'), sfx('moves') … |
| show the boon’s words on the board | boonPopup(b, nothingHappened, { x, y, life, size, col }); |
| update the numbers at the top | updateHUD(); |
| wait until the board is still | await settle(); |
When it doesn’t work
- The build says the effect is unknown. Check that the spelling is the same in the boon file and in the code and that your entry is inside of
BOON_EFFECTS(between its{and the closing};). - The game shows a blank page. A bracket or a comma is probably missing. Open the browser’s console (F12) and read the red message: it names the line.
- Nothing seems to happen. Did the floor change but not its picture? Then you need
bgDirty = true;. Did nothing at all happen? Check your.filter: maybe no square passed its test.
The other lists
The same idea works for the other kinds, too. Each list has a comment above every entry saying what it does, so reading two or three of them is the best way to start.
| To make a new… | Add an entry to | In | Further reading |
|---|---|---|---|
| boon effect | BOON_EFFECTS | engine/src/game/07-trials-boons.js | Part 2: a new boon effect |
| badge power | BADGE_POWERS (the rule) and BADGE_SHOWS (how it looks) | engine/src/01-core.js and engine/src/game/21-moves.js | Part 2: a new badge power |
| curse or omen effect | HARDSHIPS | engine/src/01-core.js | Part 2: a new hardship |
| special’s power | SPECIAL_POWERS and a rule in clearStep for what makes it | engine/src/01-core.js | Part 2: a new special |
| helper | the “helpers” section, next to the other helpers of its kind | engine/src/01-core.js | Part 2: the board |
| cover | nothing: a file in content/covers/ | Sand, water and other covers | |
| trial goal | TRIAL_GOALS and count it in trialProgress() | engine/build.py and engine/src/game/07-trials-boons.js | Part 2: a new trial goal |
Keep the rules and the show apart. Rules belong in engine/src/01-core.js, which doesn’t have any drawing or sound in it, since the bot from chapter 8 plays that file on its own to test the balance. How a badge looks and sounds goes in engine/src/game/21-moves.js.
After changing a rule, type node engine/tools/rules-test.js. It tries every helper, cover, badge power and hardship on a small board of its own and tells you if one of them no longer does what it should.
10. If something goes wrong
Things will go wrong now and then; that’s perfectly normal! These are the situations you’re most likely to run into and what to do about them.
The build stops and says a file has a problem.
- Read the line it prints. It names the file, the line, the text and what to do about it.
- Fix that one thing.
- Build again.
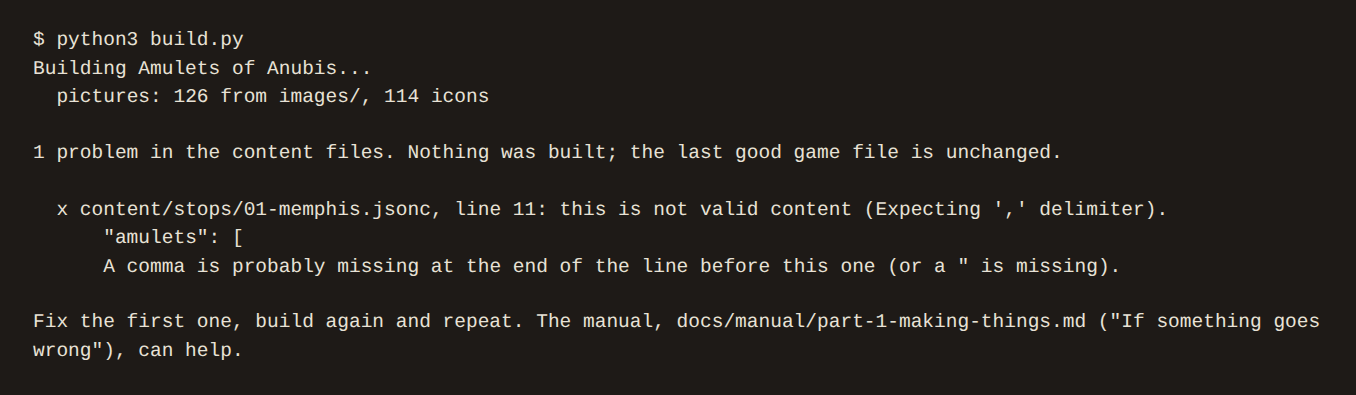
Here, the comma at the end of a stop’s "moves" line was missing. Nothing is built until it’s fixed and the game you had before keeps on working in the meantime.
These are the most common slips:
- a missing comma between two settings, or a missing quote mark,
- a key the build doesn’t know (it suggests the nearest one it does know),
- a bracket that was deleted by accident when copying a file.
Try-out mode shows something odd. Try-out mode has a save of its own. To start it afresh, open Menu → Save and restore → Complete reset while in try-out mode. This only clears the try-out save, not your real one.
The game shows a blank page, even though the build said Done.
- Press F12 (on a Mac, ⌥⌘I) to open the browser’s developer tools.
- Click on the Console tab.
- Read the red message. It names the problem and usually the line as well.
When in doubt, change one thing at a time: change it, build, check it and then move on to the next one.
11. Sharing your version
Once your version is ready to be played by other people, there are a few ways of getting it to them.
- The file itself.
dist/amulets-of-anubis.htmlis the whole game. You can send it to people, put it on a USB stick or put it on any website. It doesn’t need a server and doesn’t load anything from the internet. - As an app.
./build.shalso makes the Android app and the desktop apps for Windows, macOS and Linux. The build guide explains what each of them needs. - The licence. The code is licensed under the GNU General Public License, version 3 or later and the pictures are in the public domain (CC0). This means you may share your version and its code stays free for anyone to read and change. The README has the details.